 An annoying amount of jointing, planing, ripping and cutting to length results in sides, fronts, and backs for two small drawers. I'll be dovetailing them using my Incra TS fence on the router table. Another annoying amount time of setting up the bit height, centering the stock, and choosing a dovetail pattern leads to the first cutting step: putting a dovetail-shaped rabbet on the back of the tailboards.
 The tailboards are stacked up vertically, clamped to my homebrew right-angle fixture, and fed thru the dovetail bit...
 ...which results in this very pretty pattern. Note that the pretty pattern has "closed" cuts on the tailboards. The Incra dovetail pins have round interiors, so the tailboard has to end on "open" cuts. I remembered this was important when I was picking a pattern, but I didn't think about it enough before cutting. These are worthless...
 ...or are they? In order to end on an "open cut", I routed off the outside tails. That left one big tail in the center which somehow didn't seem right, so I split the big center tail.
 The pins are routed by feeding the stock into the bit laying flat. The block on the left limits the depth of cut.
Since I was "off the template," I had to figure the pin cuts manually, and it was wierd: there were two cuts from the template, but then I had to back 1/32" off what I assume was half-way to the following template cuts. Translation: it took a lot of head scratching, scribbling, and a few test cuts to place the pin cuts - it may look like there's just two passes here, but each one of those pockets is wider than the cutter, so it takes four passes on each pinboard to get to this point. A fairly odd-looking joint. They're not pressed together fully, because they are snug enough that I'm concerned I'd split the tails off trying to get them back apart (they need to be dadoed for the bottom before glue-up).
Now that I'm looking at it, another problem is that the bottom dado cut will have to be stopped on each end of the pinboard: if the bottom dado is located over a tail, you can do thru cuts because the "open" ends of the pinboard dado are buried under a tail (the "open" end of the tailboard dado cut terminates either inside the pin pocket or butts against the inside face of the pinboard). As it is now, if I fall asleep again when routing the dadoes, there will be a little rectangular hole in the end grain of the pinboard below the lower tail.
Maybe I'll just start over and do them right.
Sunday, December 28, 2008
Drawers
Saturday, December 27, 2008
First dry fit
 After choosing how to assemble the parts, each tenon is tweaked to fit its mortise - a great job for hand-tools (specifically, my Stanley #92 shoulder plane). Here's the left apron pushed halfway into the left front leg.
 All the legs and aprons dry-fit together, with the rough top thrown on for effect. The only thing holding it together at this point is the friction between the mortises and tenons.
 Another view. The blue tape is to label the location of each part: from this point on, it only goes together "one way."
Tenons
 To make the tenons on the ends of the apron parts, I used the table saw. The fence acts as a stop so all the shoulder cuts are (hopefully) in the same plane. The height of the blade determines how much will get removed from each side - do one side, flip it over, do the other. I nibbled away the material between the initial shoulder cut and the end of the tenon by making several passes over the blade, moving a little farther from the fence with each pass.
 Another batch job: there's no set-up change, so the parts crank thru pretty quickly. Here are the half-formed tenons on the apron stock.
 To make the edge shoulder cuts, the blade is raised, the stock is fed on edge, and the process repeated.
 The roughed-out tenons on the apron stock.
 I usually use a "combo" blade on my table saw. The "combo" refers to it being used for both rips (with the grain) and cross-cuts (across the grain). One compromise of a combo blade is that the grind on the teeth is not flat - it has points on the outboard sides of alternate teeth which prevent tear-out on cross-cuts, but which leave ridges on non-thru cuts. That's what makes the tenon look so rough after table-sawing.
 One of my woodworking epiphanies was that hand tools more than earn a place in a modern shop: they're essential tools. A few swipes of this shoulder plane...
 Cleans up the tenon surfaces really, really efficiently.
Mortises
 The benchtop mortiser: a little fiddly to set up, but it makes square holes pretty quickly thereafter. The mortises in these legs are off-center, so you can only do half of them with one set-up. Note in this pic, the stop block is clamped on the right side of the fence. Half the job had the stop block clamped on the left side.
 A mortise after a little hasty cleaning up with a chisel. They are never visible in the finished product, so I don't waste a whole lot time making them beautiful.
  The off-center mortises on two sides of each leg (before cleaning up by hand). The tapers are cut on the same side as the mortises, so you have to pay attention: a common "oops" is to mortise one (or more) legs on the wrong side. Been there, done that.
Aprons
 Apron parts roughed out. The front apron needs to have two rectangular holes in it for drawers - the easiest approach is to glue it up from smaller pieces.
 The two blocks on the end of the front apron are biscuited to the top and bottom rail. The center block is too narrow for even my smallest (#10) biscuits, so none are used there. Surprisingly, I thought to check BEFORE cutting slots which would have exposed the biscuit's corners in the drawer opening. I drove some brads in the edge of the top and bottom rails and clipped the heads off to keep the center block from skidding around under glue/ clamping pressure.
 Dry fit.
 Glued up.
Note: since this will painted, I cut the blocks to minimize waste. If it were going to have a clear finish, I would have cut the blocks from the offcut of ripping the rails so that the grain would flow across the glue joints - giving the illusion that the rectangular holes had been cut out of a single board instead of pieced together.
Friday, December 26, 2008
Tapered legs
 Make a line on the leg blank which represents the taper. Clamp the leg to the taper jig (a scrap of plywood) with the marked line aligned to the edge of the board. The part of the leg which sticks up above the plywood is the part which will be removed.
 Lay the whole thing down (with the clamps hanging off the end of the table), and butt some cleats up against the side and end of the leg and screw them down. A few hold-down clamps (only one's installed so far) keep everything snug while moving thru the saw.
 After removing the bar clamps and the leg, set the table saw fence so the edge of the jig is against the blade...
 ... then load a leg blank and check to make sure the face is square to the table. If it isn't, the taper will be a compound angle. I learned that the hard way the first time I used a jig like this.
 The leg and the offcut after a push thru the table saw.
 ... and after 8 more passes, all 4 legs are tapered on two sides.
I find it hard to visualize what a taper will look like from just layout lines, but one of the nice things about tapering is that it's not hard to move the cleats on the jig and take a little more off. I always start conservatively: it's a lot easier to taper a little more off than to add a little back on to "stiletto" legs.
Wednesday, December 24, 2008
Bedside tables
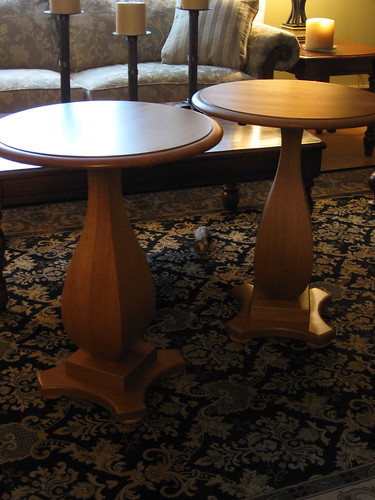

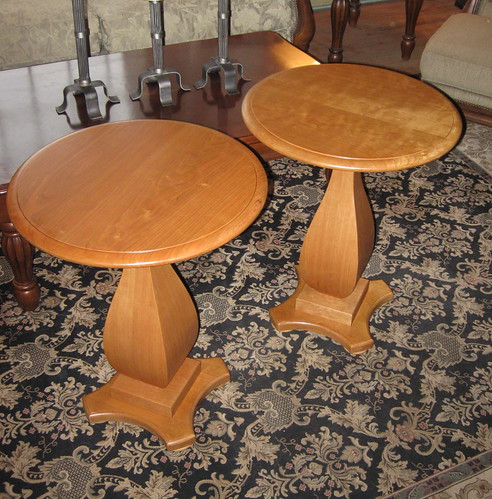
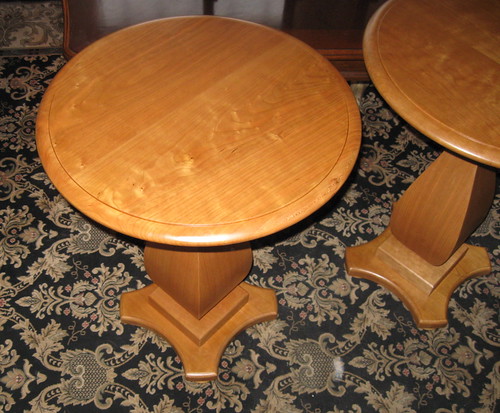
I'm no photographer, so I just take a bunch of pics with different settings, with and without flash, and pick the ones that don't look too bad.
Ready for delivery on Christmas, but the finish will still be soft for a few days/weeks.
Tuesday, December 23, 2008
Painted hall table begins
 My brother-in-law Larry and I went on a wood quest this morning and I found a clear piece of 4/4 cherry about 9' long and 12 1/2" wide! A few trips thru the planer and table saw netted this one-piece solid top. It was too bulky to edge-joint so I did the first edge with a hand plane. Much to my surprise, it came out square to the face and I pulled full-width full-length shavings from it.
Even more to my surprise, I also managed to pull full-width, full-length shavings on the end grain with my super-duper LN LA block plane - what a great feeling. Soft maple for the legs, aprons, and drawer fronts. The board standing up is still in the rough - those are saw marks, not figure. On top of the jointer: milled up apron stock, and squared, glued-up blanks for the legs.
Monday, December 22, 2008
I hate finishing

More wet finish...
After jerking around trying to get them perfect (and just making it worse), I finally just sanded it down and put another coat on the tops. Hopefully this will be "it."
Saturday, December 20, 2008
No fun
 It's not that I haven't been working on the tables, it's that it's (literally) as fun as watching paint dry. Here're the parts wet with coat #4. You have to wait a day between coats, so this gets pretty boring.
Also, with all that wet finish sitting out for a day you can't really make any dust - so, no more woodworking until the finish on these is done. Finishing always seem to fall on a weekend when I have big chunks of time available to do woodworking, so I'm hog-tied: twenty minutes of brushing then a day of sitting around = no fun.
Wednesday, December 17, 2008

Monday, December 15, 2008
Woodworking injury!
 Forgot to put this up: my first WWing injury - and hopefully the last.
When you're still veneering at 3AM... and you feel like it's OK to work tired because you're not using power tools... and you're holding an iron upside-down in your left hand to heat up the glue so you can work the seam with your right hand....
Sunday, December 14, 2008
Assembly
 From left:
1. Hanger bolt - the wood threads will drive into the pedestal, the machine threads will receive the threaded insert.
2. The brass threaded insert which will go in the top.
3. The jig to set the insert: a pair jam nuts with the insert threaded on. This will allow driving the insert into the top with a wrench (the wrench turns the top jam nut which spins the whole thing).
4. A few test holes and a practice drive.
I'd much rather chuck a piece of all-thread with the jam nuts and insert in the drill press. The drill press holds it all vertical/ perpendicular to the work so it threads in straight (you don't want the insert to thread in on an angle for obvious reasons). The drill press is too small for the tops, tho, so I'll be threading them in by hand/eye - hence the practice run. Success. Twice, even.
 Same deal with the pedestals: it's a pretty deep hole and you don't want it on an angle. Again, I'm taking my chances here by hand/eye, using the square as a guide. I probably could've made this work on the drill press but I was on a roll. I lucked out two more times.
 I used the jam nuts again to drive the the threaded portion of the hanger bolt into the pedestals, being careful to leave the right amount sticking out. I have my doubts about threading into MDF - it's not the strongest stuff for holding threads. My original plan was to drill out the center of the peds, glue a solid wood plug in, and the thread the hanger bolt into the wood plug. That attachment would only be as strong as the glue, this one is only as strong as the MDF. If this gets wobbly, strips out, or otherwise fails, I'll go with the wood plug plan.
 I drilled a center hole thru the bottom solid elements and another deep hole in the bottom of each ped. A giant lag bolt runs up from the bottom. I got the wrong size lags, tho, so I have to make another trip to the hardware store.
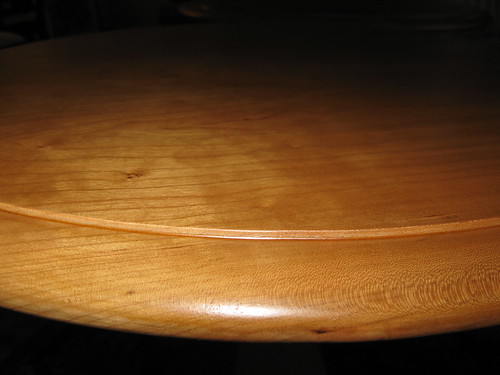
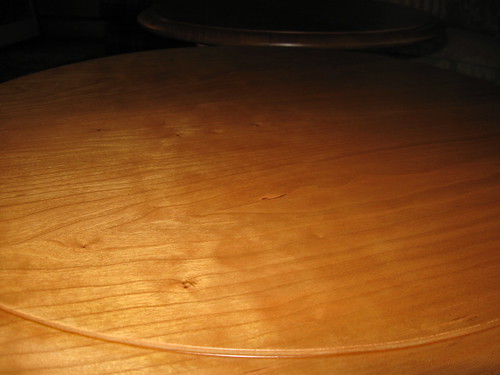
Some of the color variation you're seeing here is because some of the parts are sanded and some aren't. The top on the left, e.g., looks a lot lighter because it was sanded. Sanding dulls the gloss and leaves a white dust.
Right now my finishing plan is to spray them with shellac and see how they look. If they're too glossy, I'll shoot some Waterlox satin on them and see how that looks - the same stuff I used on the bed. Spraying finish is a little weather-dependent for me, because I spray in the garage (out into the driveway). Daylight is a big plus, too.
My brother-in-law is a professional painter with LOTS of spraying experience. He's due in for a week long visit this Thursday, so maybe I'll wait and recruit him to do it.
Thursday, December 11, 2008
Gyrations of a noob
Lest you think I know what I'm doing, here are two relevant threads in which I got inspiration, guidance, and a healthy push to do the veneering.
1. WoodNet - before I decided to do the veneer at all.
2. Woodworker's Zone - mentor's forum post.
Squaring a large blank (in a small shop)
 The large blank for pedestal 2 has to be squared up. Here I cut an edge on the table saw, then flipped it the to make the other side parallel. The blade doesn't reach even halfway thru, so it has to be cut from from both sides. Once it's flipped over onto the other face, tho, the table saw fence won't work anymore to index the next cut: the fence is too short, but more importantly, the surface I want to index from is closer to the blade than the fence is.
 Another fancy jig - an offset fence. This will allow the blank to be indexed off that recessed, already-trued face.
 Self-explanatory when you see it in action.
 But since the blade can't reach even halfway, there's still an uncut section down the middle.
 I'm not sure this qualifies as a jig, but putting two sticks of the same size along either side of the ridge gives the router a way to register to that flat face without encountering the ridge. It's pretty easy to set the cutting depth for the bit, too: just lower it until it touches a section that's been cut by the table saw.
 Then that whole ridge is easy converted into a ludicrous amount of obnoxious, and I mean really, really, obnoxious MDF dust.
 I had a little offset after routing, so I hit it with a hand plane. I checked the faces for square and lucked out.
 To square the ends you use a cross-cut sled or miter gauge, but again you have the problem of the blade not reaching all the way thru. Here it's been cut, rotated 90 degrees, cut, rotated, etc. until you've reached in as far as the blade can from each face, leaving the center uncut. The big faces that have been cut are square to the blank provide a nice surface to register a chisel against. While it feels weird hand-tooling MDF, it works well enough.
 All that produces a big, square block of MDF....
 ... which is then marked out with the template, and takes 4 trips thru the bandsaw...
 .... twins!!


