Sunday, April 26, 2009

Finishing


My fancy spray booth is very sensitive to weather conditions. Apparently hooking up a spray gun and charging the compressor pleases the wind god, who rewards the user with intermittent gusts and breezes - no matter how calm the day's been to that point.
Luckily a lot of stuff is in bloom so there's plenty of little petals and pollen to get thrown against the wet paint.

That diagonal dark line is the shadow from the garage roof.

Thursday, April 23, 2009

Ready for finish


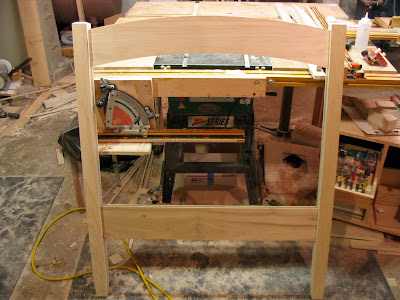
Headboard's in the clamps - woodworking is done.

A lot of stuff happened tonight:
Routed a dado on the inside of each leg to accept the panel (edge guide + plunge router).
Laid out the panel and table/ jig sawed it out.
Laid out the V-grooves to simulate the individual boards and routed them on the new router table.
Planed / chamfered all the faces / edges of the legs and rails.
Rough sanded all the headboard parts.
Glued it up.

If I didn't have to work tomorrow, it would be done. I don't see how I'm going to get multiple coats of paint on it and get it delivered tomorrow night when I'll be working most of the day.

Wednesday, April 22, 2009

Still more bed stuff
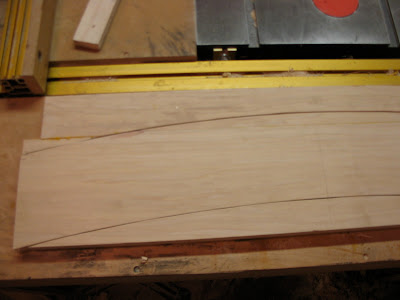
That shorter piece on top has been glued up to the wider piece. The curve was marked out (using a template from a previous project), and a jigsaw was used to cut close to the line.


The template is hot-glued to the rail and used to guide a pattern bit in the router.


The window jig was used to route mortises for floating tenons in the top rail and the legs. A slot-cutter was used to route a dado to accept the panel. I only have one bearing for the slot-cutter, so without jigging up something on the router table the depth of cut is limited to the difference between the bit's radius and the bearing's radius. As luck would have it, that depth intruded into the tenon space a little. With all that tenon glue area and the fact that the panel will be glue in (its MDF), I'm not concerned about it.

Headboard dry-fit. Still have to route dados in the legs between the mortises to accept the panel, then fab a panel and glue it all up. It's not much more work, but it's getting too late to make noise.

Saturday, April 18, 2009

More bed stuff

Deja vu round three.

The screws that hold the hardware to the rails are driven into the endgrain, which doesn't really hold screws well. Some dowels behind the screws will give the threads something to grab.

No dowel stock on hand, so I turned some.


Here they are glued in, sawed off, and planed flush. As I look at this now, I realize I forgot to orient the dowel stock with the grain running perpendicular to the rail. It'll still be much, much better than not having them there, but some screws will be going into edge or rift grain instead of face grain when they encounter those dowels.


After milling up stock for cleats, they're glued and screwed to the inside of the rails. These cleats will support the platform which in turn supports the sleeping human.

The woodworking on the rails and footboard is done. There's a little to do yet on the headboard - maybe another day - then it's ready for paint.

Sunday, April 12, 2009

Bed progress

Glued up the foot board today.


...and yet more DEJA VU.


The looking-worse-for-wear window jig yet again - this time mortising the rails for the bed hardware.


Hardware mortises squared by hand and holes marked and drilled. The extra hole on the right side of the mortise in the board on top and the left side of the mortise in the board on the bottom denote the top edge of the rail.

Saturday, April 11, 2009

Floating tenons

Using floating tenons the same size as the bed hardware allows the router "window" template to be used again. This time the mortises are 1" deep, and there will be mortises in both the legs ...


...and the rails. Note there are some scraps hot-glued to the back of the window template to align the window properly over the end-grain of the rails.


A scrap is cut to width, planed down, and the edges are rounded over. Once sliced up...


they're the loose tenons that will connect the rails to the legs.

Tuesday, April 7, 2009

Taper sled reprise

Deja vu all over again: tapering legs is tapering legs.
Here's the jig set up for the shorter taper and taller stock.
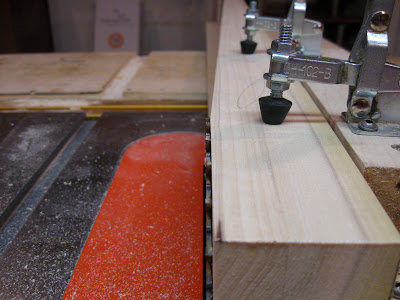


Blah, blah, blah.


After marking out the top chamfers and doodling with a hand saw, a pair of planes, and a sanding wheel on the ShopSmith, it finally dawned on me I could just miter them on the table saw.


Shaping's done. Still have to do mortises for the panel and footboard.

Monday, April 6, 2009

Bed hardware mortises

BTDT.
This is the same process as linked above - in fact, the other "half" of the process.

The bottom of the pic is the router base. The brass bushing and a 1/2" straight bit can be seen poking up from the base. The rectangular 'hole' is a window template, and the little race track inside is the cut that results from that brass bushing following the rectangular template window.
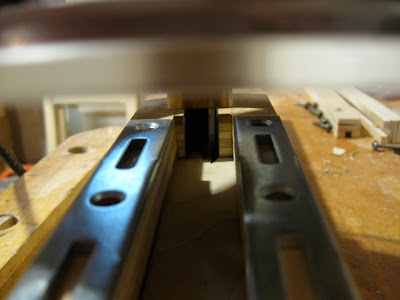
Setting the depth of cut: the hardware is rested on either side of the window, and the router is set on top. The cutter is lowered until it makes contact with the work (thru the window). That makes the cutter projection = the height of the window + the height of the hardware. When the hardware is removed and the routing commences, the depth of cut will be equal to the height of the hardware, so the hardware will sit in the resulting mortise flush.


The mortises have round ends because they were cut with a round bit. They're squared up with a chisel.


The hardware is fit to mark the holes. Notice that there are more mortises underneath the cut-outs. These mortises accept the metal fingers on the mating hardware.

Saturday, April 4, 2009

Leg blanks

To get from rough boards to these 4-square leg blanks has already involved: sawing, jointing, gluing/clamping, re-sawing, jointing, planing, and cutting to length. AKA: milling.

Some math + some scrap = a window template to make the mortises for the bed hardware. I still have the template that I used on my last bed, but it's getting beat up.

Thursday, April 2, 2009

Odds and ends

Leg blanks glued up for Colin's bed.

WoofWorld gate v1.0 skinned, but before the (uhmw plastic) top cap was installed. V2.0 is 2" wider and has less innards to make it lighter. This one was installed and has been in service for a few weeks now.

After what must be months chucked in the lathe, I parted the darning egg off today and got some finish on the parted end.

Wednesday, April 1, 2009