Sunday, November 30, 2008

Pedestal blanks

I cut down some MDF on my ludicrously-sized TS sled.


Made a half-template of the pedestal profile by marking out some key points and squeezing a thin strip between some blocks clamped at those marks. On the right is a trial with a scrap of plywood (the scrap came out of the headboard template, btw).


Another exciting picture of glue drying - this time a stack of MDF. This stack is half of the glue-up for one pedestal - I'm gluing up to end up with a 7 1/2" square by 24" long blank.

Not the greatest visualization, but the blank is giving the height while that plywood scrap is giving an idea of the profile. If it's too "bowling pin-ish," now's the time to say so.

Thursday, November 27, 2008

More feet

After remembering I had a screw center for the lathe, I decided to turn the feet instead of routing them. The downside of that is that a thin dry section like this is likely to "blow up" on the lathe when I inevitably have a chisel catch. Luckily I had no spares so I had to make a few more blanks.


Some turkey-day turning. It took longer to mount/demount than the turning on each one.

A preview of the finished base.

Aside: I don't like the new camera!

Wednesday, November 26, 2008

Feet feat

After thicknessing, the fly-cutter roughed out the feet.


...which left these little ridges since the cutter has an angle to it. I didn't think about it, maybe I could've reversed the cutter - not sure the spin direction would allow it or not. Anyway, to pattern route those ridges off...


...would put my fingers really close to the bit, so here's another crazy jig. The drill bit is the same size as the fly cutter center bit. I drilled a hole in a scrap of flooring and it presses together snugly to allow me to feed the stock around the bit while keeping my hands comfortably distant. Do a little, turn it a little, repeat.


A few wash coats of shellac to seal and protect the completed parts is bringing out what will be the finished color. Lack of photo skills + a mix of florescent and incandescent shop lights + the color settings on different monitors means this is probably far from exact color reproduction, but you get the idea.

Saturday, November 22, 2008

Some more progress on tables

Profiled the table edges, cut and beveled the base blocks, sanded. Shellac is cooking.


Hard to get a good pic of the profile, but it's a thumbnail on top and a bit of round-over on the bottom. Meh.

Cut the bevels on the base blocks with a block plane, just because. They can always be made bigger, so I started small.

Feet, pedestals, and finish remain.

Friday, November 21, 2008

Table progress
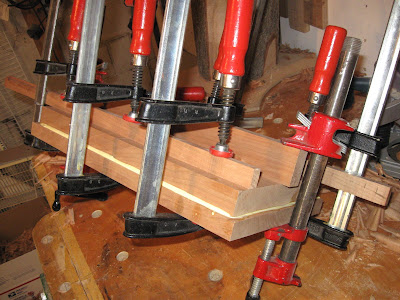
Glued up more base stock.


The tops were already starting to cup a little. Added some cross-grain battens to the underside - screws in elongated holes.

Thursday, November 20, 2008

Router table #2

Took off the left wing of the table saw and added another router table.


...underneath which hangs the Milwaukee monster on which I got a screaming online deal a few months back. If this router can't swing it, it's a shaper knife.
Note the third hole on the right, thru which height adjustments can be made from ABOVE the table.

Sunday, November 16, 2008

Drum Sander

Square the blank, cut the dado, fit the filler strip. Ash and shellac.

Friday, November 14, 2008

1000 words


This was a plan to build the MDF cores for the table pedestals. One of my online WW'ing heroes shot this down as a waste of time and effort. Current plan is glue up a solid block and band-saw it out a-la cabriole leg.

Sunday, November 9, 2008

Design questions


Object now or forever hold your peace.

Ignore all the lines on the base - it was drawn by doing 1/4 of it and copying/flipping/rotating the pieces together. I don't know how to get rid of the lines joining them.

Edge profile on the top is a swag. Note the feet on the bottom of the base. This is to give it some height and prevent it wobbling. They can easily be changed, or pitched entirely.

Saturday, November 8, 2008

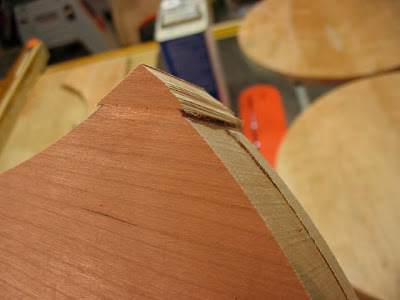
Chip out repair

Review: corner chipped out when pattern routing in a few spots due to grain orientation.


Hand-planed it down and glued on a little repair block.


Some routing, filing, and sanding later.


As good as I can get it.

Sunday, November 2, 2008

Base chip-out repair

In a few spots the bases chipped out pretty badly. In retrospect, this was easily predictable/ avoidable but I didn't think first. A great woodworker, they say, is not one who never makes mistakes but one who can hide them well.

I hand planed the rough chipped-off edge flat, which allowed a few scraps to be glued on. After gluing, I trimmed the excess off to get it a little closer. I'll clean these up by sanding to the final shape so as to not chip out the repair.


It's very ugly right now, but the grain match on the face is what matters at this point. Everything else will sand out flush.

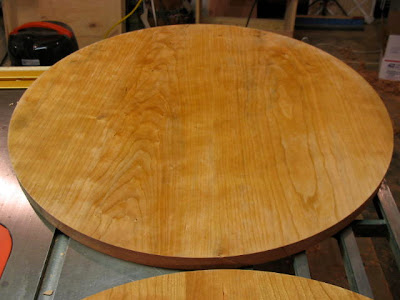
Table Tops

Super-fancy circle cutting jig: there's that pin again, strategically placed with respect to where the router plunge base is carpet-taped to a scrap of flooring from our family room remodel.


The two blanks were different thicknesses - since no one has gifted me a wide industrial planer, I'm sweaty and hip-deep in more of this stuff.


Viola.