Friday, January 30, 2009

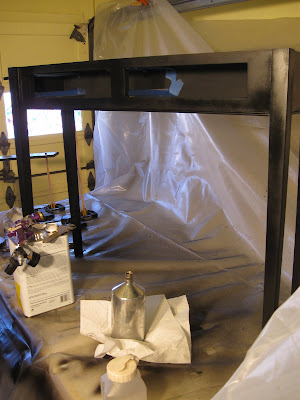
Painted hall table


"Here is a piece I made with cherry and soft maple, finished it with Waterlox and black paint, and I enjoyed making it."

...

Thursday, January 29, 2009

Painted hall table progress


I finally got some shop time in, so here's a few more little things:
- a second coat of black on the base and drawer fronts
- attached the top
- the drawer fronts are being glued on (in the pic)

Left to do:
- glue in the knobs
- plug the holes inside the drawers

Monday, January 26, 2009

More finishing hatred

Ok, I just couldn't get the finish to where I was happy with it so I decided to start over. Here it is with most of my previous labor sanded off.


Finishing, take two: no messing around with brushes, no traditional product, no multi-step finishing schedule - black oil-based paint, where I should've started in the first place.
Tomorrow this will be ready for the second, and hopefully the last, coat.

Friday, January 23, 2009

Spraying

A view when you walk into the garage from the house, looking out towards the driveway: the light is coming from the windows in the overhead door.


If you step on the other side of that plastic and look up, you see the point of all of this...

is to spend an hour fiddling around getting plastic up and running air hoses so you can spend a minute and a half spraying... followed by 15 minutes of cleaning the gun up.

On the plus side, it's all set up. This will either look great or it will be easy enough to shoot another coat.

Thursday, January 15, 2009

Darned darning egg

That black spot is pith - the very center of the growth rings. You can see them converging to it by the end grain on the top surface. The only thing that will get rid of it is turning it out - reducing the diameter until it's all gone. This is already at the finished diamter, tho.


The pith runs almost vertically thru it, so it's at the other end, too. Worse yet, there are cracks radiating from it. I planned for this to be the handle end, because it looks like there's enough un-cracked meat at the center to fit a handle in there.

This is half of a bigger piece of walnut that I started with - maybe the other half will work.

Sunday, January 11, 2009

Really, really, close to finished... maybe

First: a practice darning egg in cherry. Some things were learned. Note the backdrop.


The top might overhang the pulls. It's hard to tell, and the top isn't screwed down yet. More on that in a minute.


The drawer pulls were turned with tennons. My plan was to have the tennon run all the way thru to the inside of the drawer and then split them with a contrasting wedge. Two of my tennons are too short, but I have a plan...


...not obvious in this pic but the gloss isn't uniform, and there are some dings in the drawer fronts. I'm not sure if I should do another topcoat, strip it and do it over, or spray it with something else. Brushing finish is definitely not my strong suit.

Saturday, January 10, 2009

Turning knobs

Here's how to turn knobs:
First, chuck up a blank.

Turn it round.

Mark the location of the cove.

Turn the cove and start reducing the diameter behind the cove.

Then mash the tool rest into the almost-finished knob, throw it away, and start over.


On the second go-round, you wind up turning the blank into a knob.


Repeat that 3 more times, clean up, put all the tools away, then dip the knobs in some finish to discover that one is a dramatically different color than the others. Give up and blog about it.

Here's the view when you leave the shop in frustration.

Thursday, January 8, 2009

Finishing

Two coats of black milk paint and a wet coat of satin Waterlox.

Wednesday, January 7, 2009

I see a table....


... and I want it painted black.

The only "woodworking" that's left is to turn the pulls and attach the drawer fronts to the drawers. Before the drawer fronts can be attached, I have to make everything that's going to be black, black.

Table progress

This morning I sanded the underside of the top and did coat #1.


I can't remember if it was last night or the night before, but I finished the glue-up. Here the drawer fronts are clamped on to locate them and check out the pull locations.

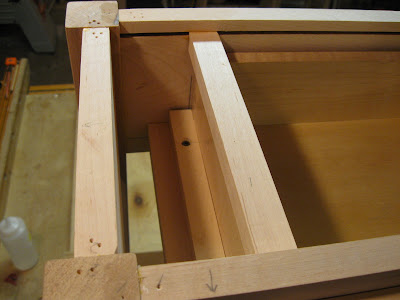
I also got the drawer runners and kickers in. This is the left side of the left drawer looking down thru the invisible table top.

Looking down at the center kickers and runners - those are the drawer fronts in the foreground, and the figured wood at the top of the pic is the inside (back) of the drawers. I know exactly what I'm looking at, and this pic STILL doesn't make that much sense to me.

Monday, January 5, 2009

Glue up begins

I'll spare you the adrenaline rush that is hand-sanding and just jump right to the glue-up: even without the added complexity of the kickers and runners, this glue up is worth breaking down into stages.


Even more exciting than sanding and watching glue dry: wet coat #3 on the top.

Sunday, January 4, 2009

Edge profile

Routing the profile on the top: at the end of an end grain cut, it's common for the cutter to tear out some of the wood fibers. A scrap is clamped on so the cut ends in the scrap, not the keeper piece.


That chunk of missing wood on the end of the scrap would have been in the keeper piece if the scrap wasn't there. Such a small amount of tear-out would have been routed off when doing the long sides anyway, but better safe than sorry.


After some sanding, the first coat of finish goes on the top.

Saturday, January 3, 2009

Table top edge profile

Left, or right?


Right


Left

Kickers and runners

After marking out the locations, a straight edge is clamped to the apron stock to locate the biscuit jointer. Note the slot cut close to the right edge of the board...


... to receive the table top fasteners. This little bracket gets screwed to the top and engages that slot. That allows the top to expand and contract with humidity changes without pulling the whole table along with it. More on this slot in a minute.


The runners biscuited...


...and fit together.


The kickers can't be biscuited in because that slot for the table top fasteners is right where the biscuits would go. So, the kickers have tongues made to fit the slot.


In theory, the drawers could be fit to this arrangement with absolutely no slop in their operation. We'll see...

Friday, January 2, 2009

Hall table progress

The beading bit buried in a scrap of plywood. The bearing sits in a hole drilled for clearance.

The apron stock beaded.
Bondo in a knothole.

A few coats of shellac on the drawers.